[schema type=”recipe” name=”How to make a Polka Dot Cake – Chocolate Orange Recipe” author=”Rachel Howard” pubdate=”2013-05-26″ image=”http://www.sundaybaking.co.uk/wp-content/uploads/2013/05/chocolate-orange-full-700.jpg” description=”2 layers of chocolate orange cake with hidden orange polka dots and smothered in a chocolate ganache” prepmins=”30″ cookmins=”45″ yield=”10″ ]
It was my step dad’s birthday the other week and as my mum has been so busy looking after my nan in hospital, I decided to make him a birthday cake for when they all came round to watch me and my sister on TV! (For those of you that don’t know, we had front row seats at the filming of the JLS Deal or No Deal Celebrity Special)
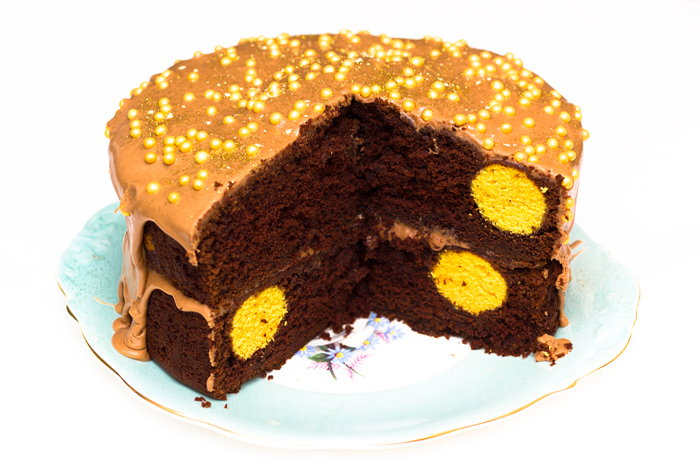
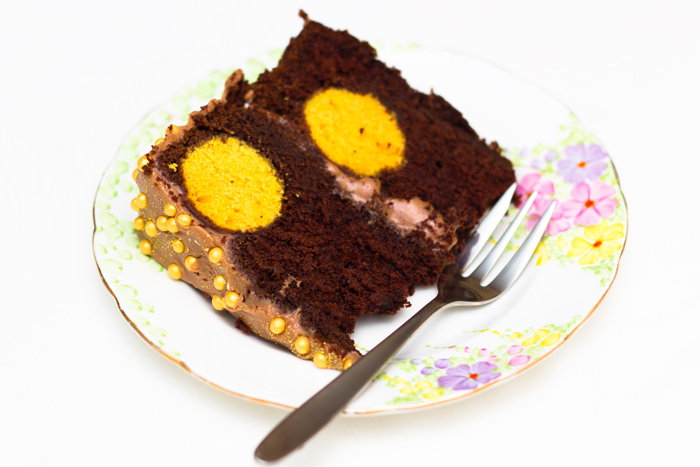
I kept seeing all these wonderful pictures of cakes that had hidden shapes in them that you saw once cut so thought I’d give it a try. I followed this great tutorial but with my own recipe.

[callout title=Ingredients for the Polka Dots]
- 100g caster sugar
- 100g unsalted butter
- 2 eggs
- 100g self raising flour
- 1/2 tsp baking powder
- 1 tbsp milk
- Orange blossom water
- Orange colouring (although I didn’t have orange so mixed red and yellow together)
[/callout]
I have never really been into cake pops. I don’t really see the point – why do you want a small round mouthful of cake when you could have a whole cupcake? Anyway, this meant I had to buy something to make the polka dots in. There are loads of trays out there but I just went for a cheap silicone one like this (I got mine for £4.99 in This is it). My biggest tip would be to make sure you fill the bottoms right up. The first time I used it I didn’t do this which resulted in odd shaped polka dots. The second time I filled it right up. The cake mix did overflow and create a big cakey mess but I was able to trim them up with a pair of scissors giving me perfectly round polka dots!
Method:
- Preheat the oven to 160°C (fan)
- Spray the cake pop pan with oil to stop the cakes sticking
- Beat the sugar and butter together until light and fluffy
- Slowly beat in the eggs
- Add the flour and baking powder and mix until combined
- Mix in the milk
- Add a drop of flavouring and colouring and mix until smooth
- Spoon into the cake pop tray and bake for 20-25 minutes (There is a hole in the top of the silicone tray – I just put a cocktail stick in this to see if the cake was cooked (If it comes out clean it’s done!)
- Leave to cool n the tray before squeezing out and trimming the edges with scissors
[callout title=Ingredients for the cake:]
(This makes 3 cakes – I only used 2 and froze the 3rd)
- 250g unsalted butter – softened
- 600g caster sugar
- 3 large eggs
- 470g plain flour – sifted
- 140g cocoa powder
- 2tsp bicarbonate of soda
- 1/2 tsp salt
- 375ml buttermilk
- 1 tsp vanilla extract
- 375ml boiling water
- Orange blossom water
[/callout]
Method:
- Preheat the oven to Gas Mark 4 / 160°C (fan) / 180°C and line 3 20cm (8in) cake tins
- In a freestanding electric mixer with the paddle attachment (or using a hand-held electric whisk) cream the butter and sugar together until light and fluffy
- Add the eggs one at a time, mixing well after each addition
- In a medium bowl, sift the flour, cocoa powder, bicarbonate of soda and salt together
- Mix the buttermilk, vanilla extract and a few drops of orange water together in a jug
- Add 1/3 of the dry ingredients to the creamed butter and sugar – mix well on a medium speed
- Add 1/3 of the buttermilk mixture – mix well on a medium speed
- Repeat these steps until it is all combined
- Slowly add the boiling water, mixing until combined
- Place the orange plka dots into the base of the cake tins
- Divide the batter evenly among the prepared cake tins, just covering the polka dots
- Bake for approximately 35-45mins
- Remove from the tins and allow to cool completely before frosting
[callout title=Ingredients for the Ganache icing]
- 200g milk chocolate
- 300ml pot extra thick double cream
[/callout]
Method:
- Break the chocolate up and melt
- Slowly add the cream (you may not need to use all the cream depending on how thick you want the icing)
- Leave to cool until it starts to thicken and then drizzle in the middle of and pour over the cake. It will drip down if it’s not thick enough but this is the look I wanted for this cake
- Add any decorations to the top – I used Dr Oetker soft gold pearls and edible glitter
This cake was delicious. And it lasted too – I baked it on the Sunday and kept it in the fridge. We finished it off on the Wednesday but it was still lovely and moist…not sure it would last that long in many houses though!? And it got a lot of oohs and aahs when people saw the polka dots….”oooh, how did you get them in there?!”

And of course you could do whatever flavour and colour combinations you want!
Beautiful cake you have here, congratulations! I love Polka Dots Cakes, and this combination of colors and flavors is amazing!