[schema type=”recipe” name=”How to make your own 3 Tier Wedding Cake” author=”Rachel Howard” pubdate=”2013-06-05″ image=”http://www.sundaybaking.co.uk/wp-content/uploads/2013/06/wedding-cake-700.jpg” yield=”100″ ]
This time last year I was going through a pretty busy, stressful time…buying our first house, helping to organise a Festival for 2500-3000 people with work AND bridesmaid duties for my little sisters wedding. All this in the space of 2 months!
Why did I say I would make the wedding cake?!?!…because I love her of course and wanted to help out as much as I could. I had never made a tiered cake before so this was pressure. But because of everything else that was going on I just kind of got on with it!
And I wanted to let you know that it’s a pretty simple task if you have a little spare time (or have a big sister that has a little spare time!). The only worry I had was that of it toppling over, but it didn’t so all was good!
As it was a year ago, I can’t remember exactly what recipe I used, but it was for a dense chocolate cake. I bought 3 spring form tins in the sizes I wanted and baked the 3 cakes 2 days before the wedding. Then the day before I decorated them and they were put together on the morning of the wedding.
I’m not an expert, so I’m sure this isn’t a perfect guide but it worked for me!

DAY ONE: (If you are making fruit cake, you can make the cake months in advance)
STEP ONE: Bake 3 cakes at different sizes. Each cake should be at least 2 inches bigger than the one sat on top of it. I baked: 15cm/6in, 23cm/9in and 30cm/12in and it fed around 100 people. This is a pretty good guide to work out portions. Wrap the cakes in clingfilm and refrigerate overnight.
DAY TWO:
STEP TWO: Place the bottom cake on a thick cake board at least 2 inches bigger than the cake (put some chocolate ganache on the boards – this will stop the cakes from slipping off!)
STEP THREE: Place the top cakes on a thin cake board the same size as the cake
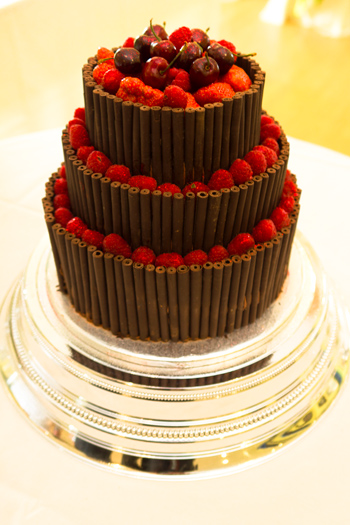
STEP FOUR: Cover the cakes one at a time with a chocolate ganache and then go around with chocolate cigarellos while the chocolate ganache is still fresh (I then tied string around them to hold them on until the big day!), cover and leave in the fridge to set.
DAY THREE (Day of the wedding!):
STEP FIVE: place at least 3 cake dowels into the bottom 2 cakes. These need to be placed in a triange formation near the centre of the cake. Push them in, mark the top of the cake, pull them out and cut at the cake line. When you place them back into the cake you shouldn’t be able to see them above the cake. (I actually put more than 3 dowels in as I really didn’t want it to collapse…I put a few round the edge of the cake too!)
***Cake dowels are clear tubes that you place into the bottom two cake layers to help support the cake on top. Without these, the cakes would collapse on each other***
STEP SIX: This step was done on site and it was actually my mum that did this while I was having my hair and make up done! gradually lower each cake on top of each other.
STEP SEVEN: Fill the gaps with cherries, strawberries, blueberries…anything you want! I then added a little glitter to make it sparkle and removed the string.
I also took some spare chocolate cigarellos and chocolate ganache with me in case I needed to do any touch up jobs.
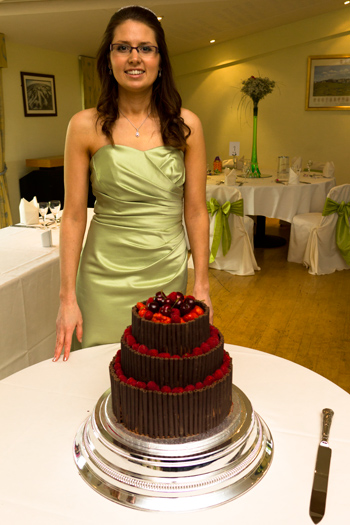
I think you will agree that it looks beautiful. Not perfect, but who wants a perfect cake that tastes dry and bland?! If you have a little patience you can save a lot of money by making this style of wedding cake yourself!
Chocolate cigarellos – I ordered these online. The website is really good as it shows you how many you will need for the size cake you will be decorating.
Cake dowels – I used clear acrylic ones and I just got them from Ebay.
Oh and get some edible glue (yes…it really does exist!) for any last minute fixes!
HAPPY ANNIVERSARY AMY AND DEAN!


Wow, that is pretty cool wedding cake..
You’ve done a great job, looks very professional to me. If you plan on making a lot more cakes or going pro this is a great tool that will help you.
http://www.bakingit.com. I use both the apps so my customers can see what their cakes will look like and how many it will serve. The “cake stacker” http://cakestacker.bakingit.com is my favorite.