[schema type=”recipe” name=”Honey and Pear Layer Cake – The Hummingbird Bakery Recipe” author=”Rachel Howard” pubdate=”2013-09-22″ image=”http://www.sundaybaking.co.uk/wp-content/uploads/2013/09/Pear-and-Honey-Layer-Cake-700.jpg” description=”A delightfully spiced Honey and Pear Layer Cake – perfect for a special occasion ” prepmins=”20″ cookmins=”30″ yield=”8-10″ ]
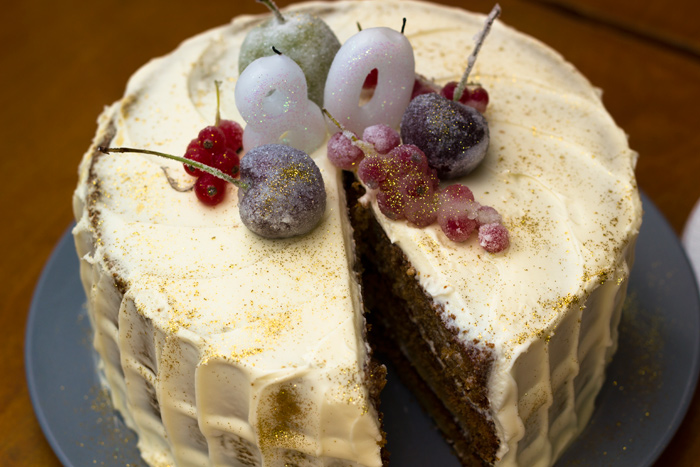
I made this beautiful Honey and Pear Layer cake on Friday for a special occasion…
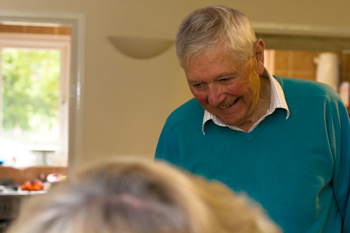
It’s my Grandads 80th Birthday tomorrow!! Mum decided to throw him a surprise birthday party in the afternoon after my coffee morning which worked out perfectly – we just stayed on in the same venue!
When the coffee morning was over and people started to leave a few of us transformed the cake table into a ploughmans lunch table, got out the balloons and put up old photos. All of this was going on behind Grandads back – he was totally oblivious to what was happening behind him.
I believe he got up to get another slice of cake when he suddenly realised!
When deciding on what cake to make I originally thought I would go for something traditional. I’m not sure Grandad would be keen on a cream cheese frosting so was looking for a simple chocolate recipe. Flicking through my recipe book I cam across this on. Pear and Honey – two things my Grandad loves. So I thought Sod the fact it has cream cheese in the frosting – I have to make this! He will never know!!
Surprisingly easy to make this cake is full of flavour, not overly sweet and beautifully moist. Everyone loved it.
[callout title=Ingredients for the Caramelised Pears:]
- 3 pears
- 20g unsalted butter
- 60g runny honey
- 40g caster sugar
[/callout]
Method:
- Peel and core the pears and cut lengthways into about 12 slices
- Place the remaining ingredients in a saucepan and melt together on a low heat
- Add the sliced pears and cook until golden
- Set aside to cool while you make the sponge batter
[callout title=Ingredients for the Sponge:]
- 4 large eggs
- 120g caster sugar
- 40g soft light brown sugar
- 120ml buttermilk
- 120g runny honey
- 120ml vegetable oil
- 1 tsp finely grated lemon zest
- 280g plain flour
- 1 1/2 tsp baking powder
- 1 tsp bicarbonate of soda
- 1 tsp ground cinnamon
- 1 tsp salt
[/callout]
Method:
- Preheat the oven to 170C and line the base of the sandwich tins (the recipe asks for 4 8in cake tins but I used 3)
- Using a handheld electric whisk or a freestanding electric mixer with the paddle attachment cream together the eggs and sugars until light and fluffy
- In a jug stir together the buttermilk, honey, vegetable oil and lemon zest
- Pour the liquid into the creamed ingredients while mixing on a low speed
- Sift together the remaining ingredients, add to the creamed mixture and mix together on a medium speed to ensure everything is well encorporated
- Divide the cake batter evenly between the prepared cake tins
- Top the batter with the cooked pears (The book says: allowing nine slices per cake and placing them in concentric circles, each slice evenly spaced apart – I didn’t worry about this too much!
- Place in the oven and bake for 25-30 minutes or until each sponge is golden brown on top and bounces back when lightly pressed
- Allow the cakes to cool completely before you frost them
[callout title=Ingredients for the Frosting:]
- 500g icing sugar
- 100g unsalted butter, softened
- 250g full fat cream cheese – I used Philadelphia
- 50g runny honey
[/callout]
Method:
- Using the electric whisk or mixer witht he paddle attachment slowly mix the butter and icing sugar together until no large lumps of butter remain and the ingredients have a sandy consistency
- Add the cream cheese and honey and continue mixing on a low speed until incorporated
- Increase the speed to medium and beat the frosting until it’s light and fluffy
- Once the cakes are cooled, place the first layer cake on a plate and top with 3-4 tablespoons of frosting, smoothing it on with a palette knife and adding a little more if needed
- Continue this process with each layer
- When you have added the final layer frost the sides and top of the cake covering it completely so that no sponge can be seen.
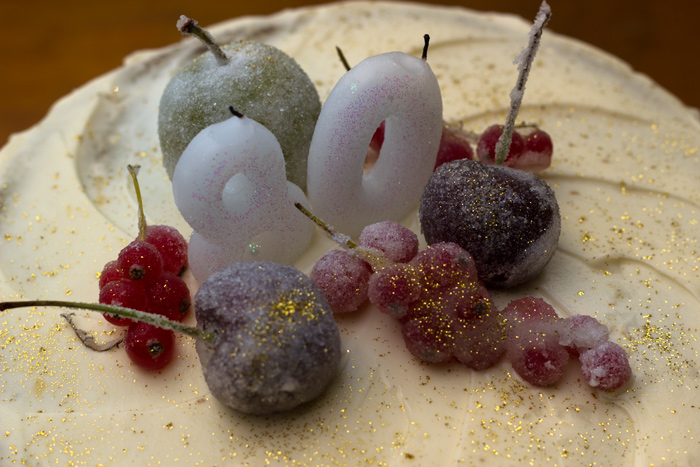
I decorated it by…
Using the flat tip of the palette knife, add texture to the sides of the cake by gently pulling the palette knife upwards, from bottom to top, to create lines in the frosting.
Again using the flat tip of the palette knife, create the pattern on the top of the cake by starting from the outside edge and pulling the knife over the frosting and into the middle in gentle curved lines.
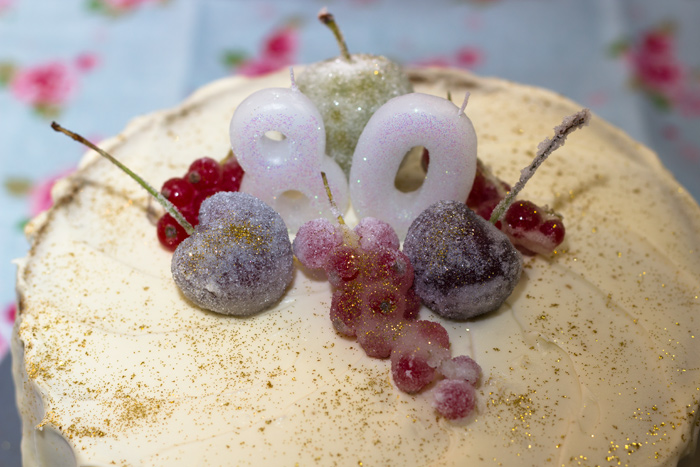
Crystallised fruits are so easy to do and look magical – I used cherries, redcurrants and greengages but you could use anything you like! Fruits, petals and leaves all look fabulous!
- Whisk an egg white in a bowl until frothy
- Prepare a second bowl with a generous amount of caster sugar
- Dip your chosen fruits into the frothy egg white so that it’s completely covered, then roll or press into the caster sugar. The sugar crystals will stick to the egg white (I sprinkled some edible glitter over them too to add a bit of sparkle!)
- Place the crystallised items on a tray lined with parchment paper and leave to dry overnight before using them to decorate your cake.
And that’s all there is too it. This make s a great cake for a Special Occasion and would work well at Christmas if you wanted something a little different!
If you have a go at making this post a photo onto my Facebook page so I can see!!
Happy Birthday Grandad!!! xx
Leave a Reply