Last year I made Paige a Squirrel cake. It must have been good as they came back for more.
Paige has just turned 4 and what she really wanted was a sleeping beauty cake….lots of pink and gold hair! This is the type of cake I love creating!
This is how I made it…
[callout title=Ingredients for the cake]
- 8 eggs
- 450g caster sugar
- 450g self raising flour
- 4 tsp baking powder
- 450g butter
[/callout]
Method:
- Preheat the oven to 180C
- Grease a cake tin – I used a 35cm x 24cm (13½” x 9½”) sized tin
- Break the eggs into a large bowl
- Add the sugar, flour, baking powder and butter
- Mix everything together using a freestanding electric mixer – don’t over mix
- Pour the mixture into the cake tin
- Bake for around 30-40 minutes – I can’t remember how long mine took. I set the timer for 20 minutes then I checked it at 10 minute intervals.
[callout title=Ingredients for the ‘jam’:]
- About 30 medium strawberries finely diced
- 200g granulated sugar
- 4 Tablespoons cornflour
[/callout]
Method:
- Place the strawberries in a small saucepan over medium heat.
- Stir constantly for about 4 full minutes until the strawberry juices have been released.
- Add the sugar and cornflour and continue to stir for another 2 minutes.
- The mixture will be much thicker.
- Remove from heat and allow to cool.
[callout title=Ingredients for the strawberry cream topping:]
- 700g whipping cream
- 6 Tablespoons granulated sugar
- 3 teaspoons vanilla extract
- 1 tbsp strawberry ‘jam’
[/callout]
Method:
- In a large bowl, whip the cream, sugar, and vanilla extract together on high speed until stiff peaks begin to form, about 4-5 full minutes.
- Add the remainder of the strawberry ‘jam’ and continue to beat for another 30 seconds.
How I put the cake together:
- Cut the cake in half so you have 2 smaller rectangles, then slice each cake through the middle so you have 4 layers in total (I only used 3 layers)
- Place the bottom layer on the cake board and top with ‘jam’ (you can always use shop bought jam for this!)
- Cover in strawberry cream
- Repeat this layering with the amount of layers you would like
- I then covered the cake with a very thin layer of a basic vanilla buttercream to stick the icing to
How I decorated the cake:
Unfortunately I was short on time so I didn’t have chance to take photos along the way. This is what I did…

- Roughly 2 nights before I made the cake I made the princess using flower paste and a mould. This gave it time to set hard
- Once the cake was layered together I covered it with a thin sheet of white sugar paste icing
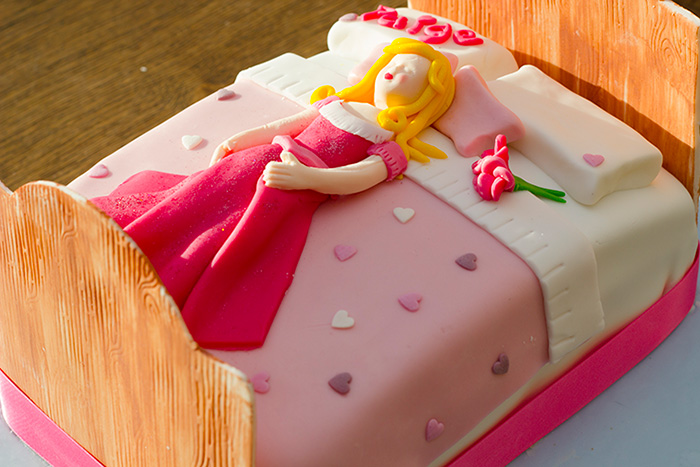
- Cut out a pink square shaped thin layer of sugar paste icing and place on top as the duvet cover – I then added a white strip along the top
- The pillows were just made from pink and white sugar paste icing
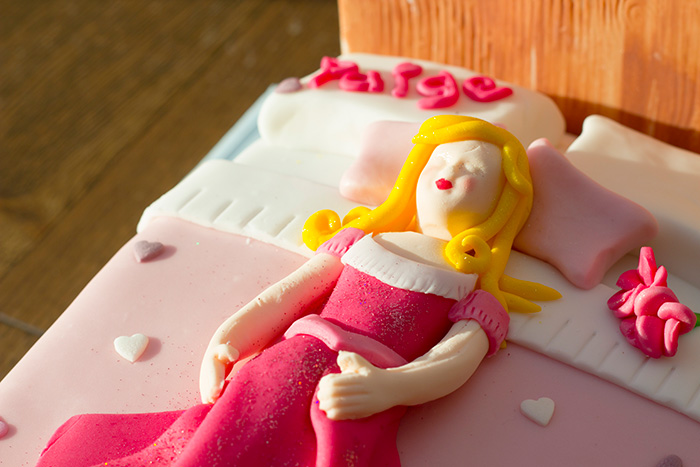
- Once this was in place I put the ‘naked’ princess on the bed
- I started to dress her by placing sugar paste around her body and moulded it to her. Then I added a circular piece as the skirt and folded it slightly to create the skirt effect
- I painted on her lips with gel colouring and a small paintbrush and used edible glitter as eyeshadow
- Her yellow hair was rolled up pieces of sugar paste stuck on with edible glue and painted with edible glitter to make it sparkle
- Finishing touches were sugar paste flowers, edible glitter on her dress and heart ‘sprinkles’ to create a pattern on the bed
The headboard was made using flower paste and then indented with a wood pattern and painted using gel colouring. I thought it would set hard and stand upright but it didn’t quite work. I kept it out to dry for 3 nights and didn’t put them on the cake until I got to the party, but by the time it was brought out it had flopped a little so if anyone can suggest a better way of doing this it would be greatly appreciated!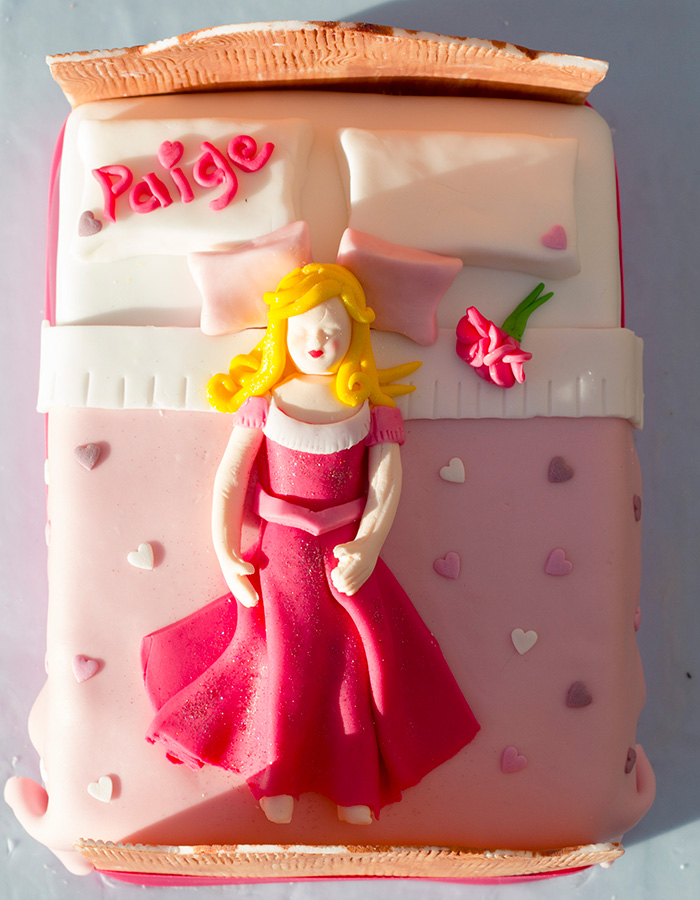
This cake wasn’t hard to decorate and I feel anyone could do this – have fun and be creative!
WOW!!!..wonderful you a such a very talented person. you really baked a amazing cake with great idea. Nice decoration. LOVED IT
Thanks!!