[schema type=”recipe” name=”Chocolate Baby Shower Cake Recipe” author=”Rachel Howard” pubdate=”2016-03-24″ image=”http://www.sundaybaking.co.uk/wp-content/uploads/2016/03/Baby-Shower-4-700.jpg” description=”A delicious 3 layer chocolate cake filled with a creamy chocolate buttercream. Topped with a blue speckled frosting and chocolate ganache with chocolates spilling over the sides. This cake can be tailored to any celebration! ” prepmins=”40″ cookmins=”25″ ]
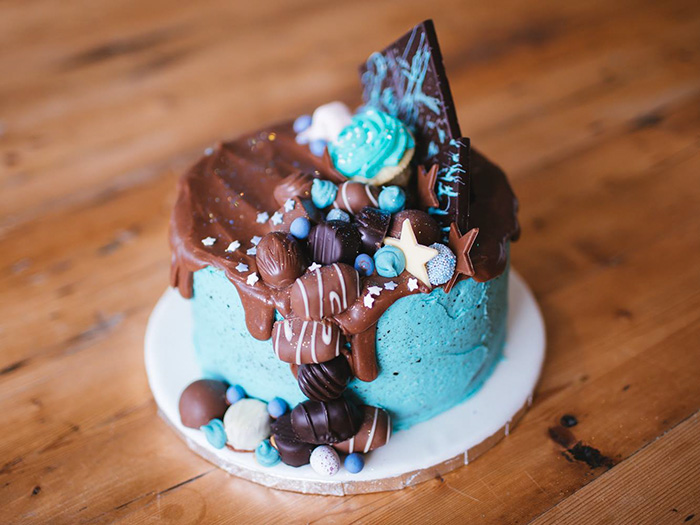
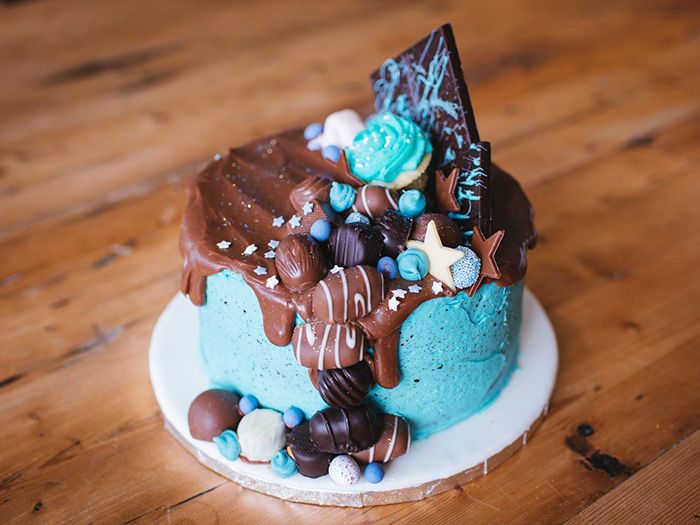
This week I had a surprise baby shower cake to make and decorate. I wanted to do something a little different to the ‘standard’ baby shower cake and as I was told the mum-to-be loved chocolate I thought I would bake an ultimate chocolate cake and cover it in chocolates!
And I’m really happy in the way it turned out, despite finding it really difficult to find any blue sweets! Despite the really lengthy looking instructions, this was actually a really easy cake to decorate. And it can be adapted to any celebration – just take the baby away and you have a really indulgent celebration cake!
Points to note BEFORE you start this cake…
- If you are making a baby from sugar paste, make this in advance so it has time to dry and harden.
- Make the cake first. Once the cake is out of the oven and cooled you can make the chocolate frosting.
- Once the cake is stacked and filled with the chocolate frosting, start to make the blue vanilla frosting.
- Don’t make your chocolate ganache until the cake is dry and ready to decorate.
- Make sure you have all your decorations ready before you add the chocolate ganache as you will need to work quickly once this is on the cake.
- If you have a colour scheme for your decorations and are struggling to find sweets in this colour (I really struggled with blue!!) melt some white chocolate and add some food gel colouring. With this you can drizzle coloured chocolate over anything and pipe small buttons to add to your cake.

[callout title=Ingredients for Ultimate Chocolate Cake sponge]
- 280g plain flour
- 400g caster sugar
- 80g cocoa powder
- 2 teaspoons baking powder
- 1.5 teaspoons baking soda
- 1 teaspoon salt
- 1 teaspoon instant espresso powder
- 245ml milk
- 80ml vegetable oil
- 2 eggs
- 2 teaspoons vanilla extract
- 240ml boiling water
[/callout]
I spread this between three 8″ cake tins.
Method:
- Preheat the oven to 180C and line or spray your cake tin (I lined mine with parchment paper)
- Put the flour, sugar, cocoa powder, baking powder, baking soda, salt and espresso powder in a large bowl and mix until combined. I did this in a freestanding mixer with the paddle attachment.
- Put the milk, vegetable oil, eggs and vanilla extract into a jug and whisk gently.
- Add the milk mixture to the dry ingredients and mix on a medium speed until well combined.
- Reduce the speed and slowly add the boiling water. Beat on a high speed for about one minute.
- Pour the batter into your tin/tins and bake for 20-25 minutes (you may need longer if you use bigger tins) – insert a cocktail stick – if it comes out clean it’s cooked!
- Remove from the oven and let to cool for 15 minutes before removing it from the tin.
- Let the cake cool completely before frosting.
[callout title=Ingredients for the Chocolate Buttercream (inside the cake)]
- 187g butter
- 100g giant chocolate buttons (or whatever chocolate you want your frosting to taste of!)
- 100g icing sugar
- 3 tablespoons cocoa powder
[/callout]

Method:
- Melt the chocolate buttons in the microwave or over a pan of hot water and leave to cool slightly.
- Cut the butter (room temperature) into cubes and cream it in a freestanding mixer.
- Add the icing sugar slowly.
- Pour the slightly cooled melted chocolate into the mixture and mix well.
- Add the cocoa powder and mix.
- Turn the speed to high and beat the mixture until thick and creamy.
[callout title=Ingredients for the Blue Vanilla Buttercream]
- 250g icing sugar
- 80g unsalted butter
- 2 tbsp milk
- a few drops of vanilla extract
- blue food gel
- 1 tsp Cocoa powder (for speckle effect)
- 1.5 tsp Vanilla extract (for speckle effect)
[/callout]
Method:
- Beat the icing sugar and butter on a medium-slow speed
- In a separate bowl, mix the vanilla and milk together
- Beat the milk mixture slowly into the icing sugar mix
- Turn your mixer to high and beat well
- Add the desired food gel
- Continue beating the mixture until light and fluffy
[callout title=Ingredients for the Chocolate Ganache]
- 100g chocolate buttons (or dark chocolate if you prefer)
- Double cream
[/callout]
Method:
- Melt the chocolate and slowly pour in the cream until you get your desired consistency. At first it went grainy, but by adding more cream and mixing well, the mixture became runny. I’m really sorry but I don’t know the exact amount of cream that I added.
[callout title=Decorations (all adaptable!)]
- Chocolates – I used a box of mixed chocolates
- Chocolate bar broken into large pieces
- If you are using a colour scheme, any sweets in this colour
- Edible glitter
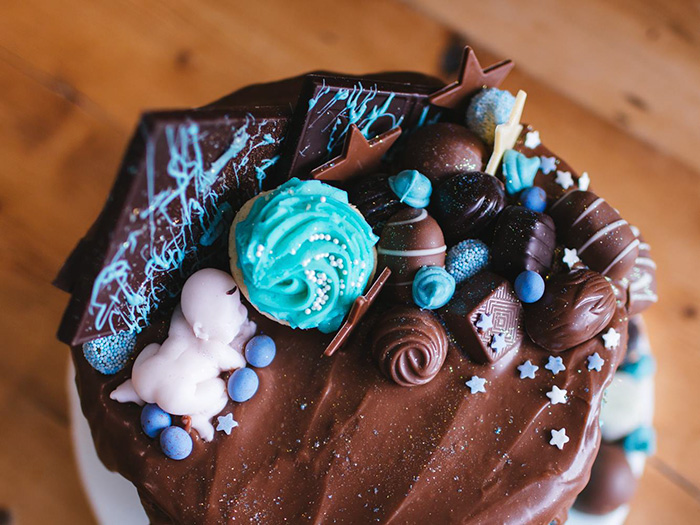
- Baby mould and sugar paste
[/callout]

[callout title=Putting this cake together!]
- When your cakes are cooled place one on a cake board (or plate) and top with chocolate buttercream. Add the next cake and again, top with chocolate buttercream. Add the top cake to the tier.
- Cover the cake in a thin layer of the vanilla frosting. This is a crumb coat. Once the cake is covered, pop it in the fridge for 5 minutes. Once cooled, cover the cake in a nice thick layer of the vanilla frosting.
- To speckle the cake mix together the vanilla extract and cocoa powder. Dip a clean pastry brush into the cocoa and vanilla mixture and flick all over the cake. It’s probably a good idea to practice this on a piece of kitchen paper first. Leave to dry.
- Once the cake is dry you can add the chocolate ganache to the top. Spread right to the edge of the cake to encourage it to drizzle over the sides.
- Once the ganache is on the cake start to add all your chocolates and decorations. If you need to stick anything to the sides just use a bit of ganache to secure it.
- The joy of this design is that the cake doesn’t need to be perfect. Use big pieces of chocolate at the back to create height and then just add what you want! I finished this cake with a sprinkle of edible glitter.
[/callout]
The baby shower was a true surprise and everyone loved this cake. It’s most definitely a cake that I turn to time after time!
Love this design! and the colours…